
Holly-Jolly Christmas DIY’s
By: Cadence and Malak
Christmas!!! ‘Tis the most wonderful time of the year, therefore you MUST have astonishing decorations! Let’s get started!
 Reindeer Christmas Cards! These cute cards will definitely shine their way into your heart. The things you will need to make these cards are one blank card, a brown, red, and black marker or paint, a pen, glue, and googly eyes. First, take your blank card and write your message onto it. Next, draw or paint the shape of the reindeer heads onto your card along with the antlers. Finally glue on the googly eyes and paint the noses of your reindeers on. All that’s left to do is give this to a family member or friend. This cute card is perfect for Christmas and is pretty easy to make.
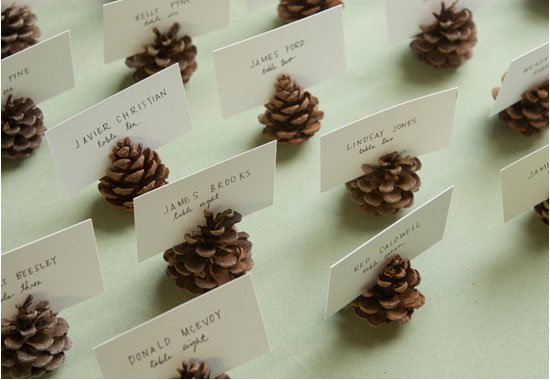
Another cool DIY is a Pine Cone Card Holder. This is a very simple idea to hold a card with just a couple of materials.
You will need a card, a pine cone, a sharp knife, and some paint if you would like it to be a specific color. First, take your knife and and cut a slit through the middle. Try not to break or crack the pine cone while doing this. Next, paint your pine cone if you would like to, then leave it out to dry. Finally, place your card into the pine cone. It the pine cone can’t stand on its own, cut the bottom so that it’s flat. This simple yet adorable creation can also be used after the holidays to hold papers so don’t just throw it out.
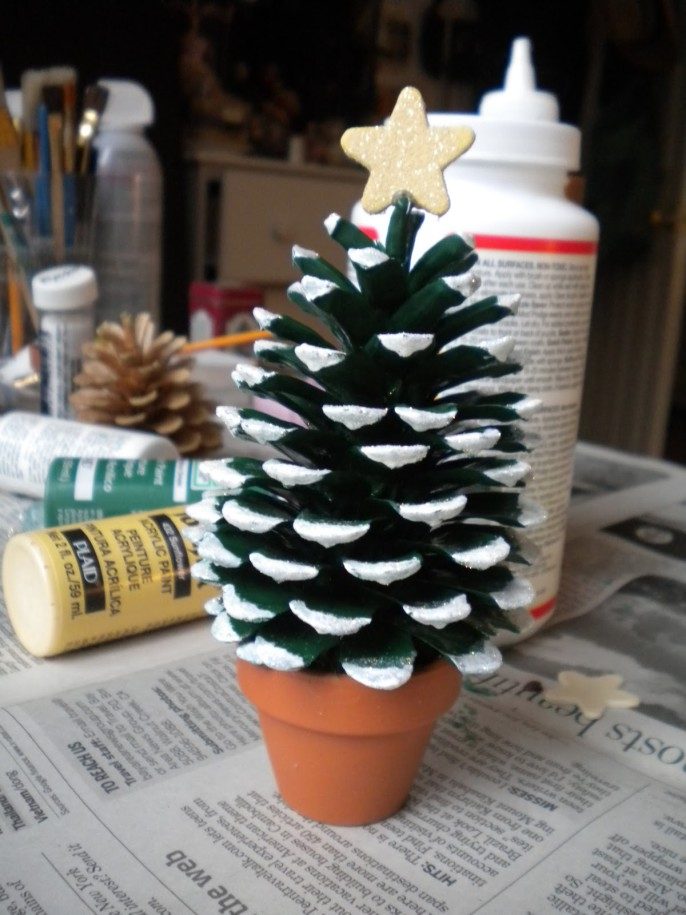 The last merry DIY is a Mini Christmas Tree. This delightful DIY is a Christmas present for everybody in your family. To make this you will need a pine cone, green paint, white paint, paintbrush, styrofoam, scissors, glue, gold glitter, and a miniature pot if you would like it to appear as a plant. First, paint your pine cone green. Make sure that the pine cone is completely covered, then let it dry. While the pine cone is drying, take your styrofoam and cut it into a star shape. Lightly put a sliver of glue on the star then sprinkle it with the gold glitter. Leave this out to dry too. When the pine cone is finished drying, take the white paint and only paint the edges of the “leaves”. Before you leave the pine cone out to dry, take your star and glue it onto the top. Then, wait until it dries. Finally, you have your tree. If you have a miniature pot, place your tree into it. Now place your Christmas tree wherever you would like it to be and enjoy the outcome.
Now you have three amazing, and adorable Christmas DIYs. These can be used as presents or decorations. We hope you try some of these and have a Merry Christmas!!!
Pictures Adapted From:
Reindeer Christmas Cards-http://studio5.ksl.com/index.php?sid=2217519&nid=118
Pine Cone Card Holder-jamiebrock.hubpages.com
I like your DIY ideas!
ReplyDeleteI love these ideas!
ReplyDeleteThis comment has been removed by the author.
ReplyDeletei might just make the tiny chirsmatas tree XD
ReplyDeleteThis comment has been removed by the author.
ReplyDeleteThese are so awesome! Can't wait to see more DIYs!
ReplyDeletethe idea that you picked is a really good idea I might do it at home soon.
ReplyDeletenow i really want to try to make these crafts
ReplyDeletereally good DIY i might do 2 of them
ReplyDelete